
Many, many people have asked me how I custom fabricate the aluminum brackets and hardware I have on my car. I had the opportunity to document the process during the development of a bracket for my mini washer fluid reservoir project. Hopefully it will help anyone who wishes to fabricate some of the more simple items needed to make a custom installation look "professional."
The tools I use to make a bracket are quite basic and include: a good sized bench vise - securely mounted, a hack saw, metal files of various shapes, sizes, and cuts, sandpaper, and an electric drill and drill bits. That's it. If you want to polish your product then I use 400 and 600 grit wet sandpaper and red polishing compound on a buffing wheel mounted to a generic bench grinder. As for material it's usually 1/16" thick sheet aluminum. If something heavy duty is needed and minimum bending required then 1/8" thick aluminum is better. I have also used angle aluminum, 1/8" and 1/4" thick as well, and various sizes of solid aluminum rod.
| Step One: What is it you are trying to mount? Find a suitable location with mounting points for your bracket. In this case where to mount the mini washer fluid reservoir? It was decided the ignitor mounting screws could be used as the mounting point with the mini tank "hung" from these screws. |
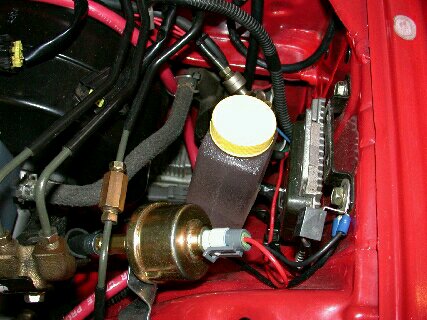
The potential location for the mounting |
|---|
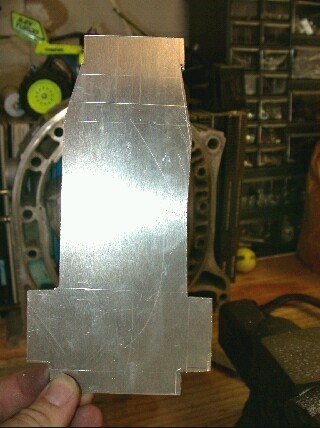
| Step Two: Create a template. I use cereal box cardboard. It's of comparable thickness to the aluminum yet stiff enough to maintain it's shape when bent to mimic what it is you intend to fabricate out of aluminum. With the cardboard bracket made, flatten it out to use as the template. |
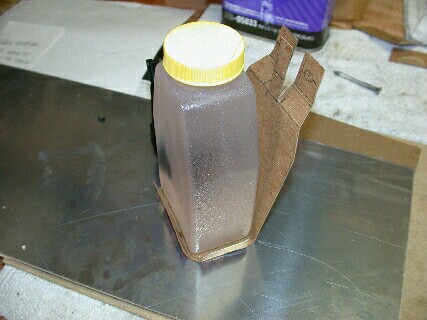
Cardboard bracket to be used as the template |
|---|
| Step Three: With the now flattened cardboard bracket as a template mark the pattern onto the sheet aluminum. Be sure to mark the lines for where the bends are to be, in addition to the outline of the bracket and mounting holes. |
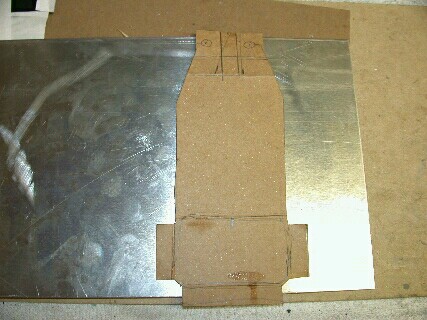
Cardboard bracket to be used as the template |
|---|
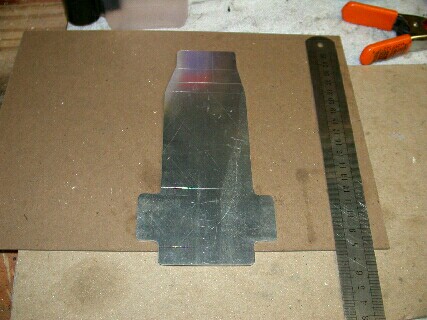
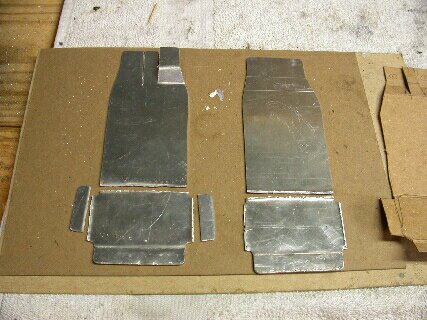
| Step Four: Lightly score the pattern onto the aluminum where cuts are to be made. Pen marks I've found tend to disappear during cutting, filing, and general handling. Scoring should not be used (as pictured!) where folds are to be made as this introduces flaws from which cracks can propogate. This part, however, being generally non-strutural and lightly loaded, fatigue cracking isn't really an issue. Mark the bend lines with a permanent marker after cutting and filing is complete. |
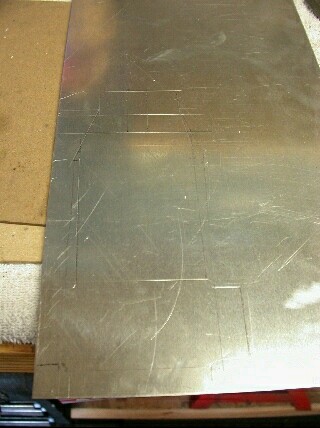
Scribed pattern |
|---|
 ...
...
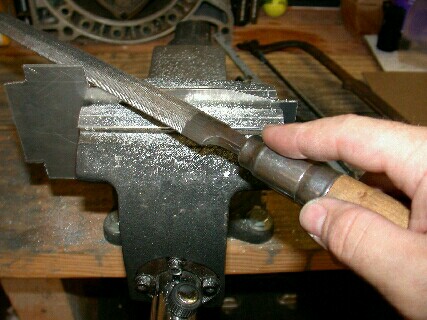
Step Six: Filing. Using a metal file remove the excess material left over after cutting. File right to the score marks of the template pattern. Note the score marked pattern will be ever so slightly larger than the cardboard template due to the thickness of your pen or scoring device. This will be removed during final sanding and prepping for polishing. So file right up to but not over the score marks. Flat files can be used for most work but I've found round files are good for making nice inner radiused 90 degree fillets.
 ...
...
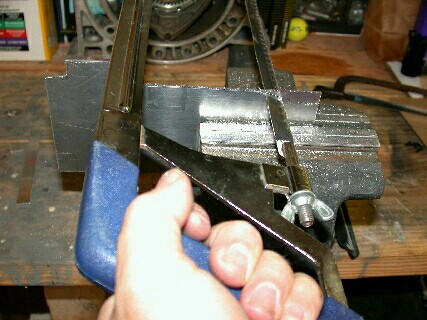
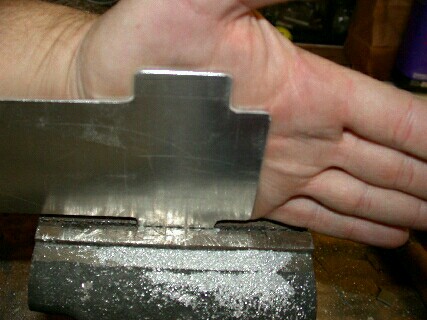
Step Seven: Bending. Now here's the tricky part. The bending is relatively easy, it's figuring out how to position the bracket in the vise to get the proper bend required. It definitely requires some forethought...so think before you bend. Line up the mark indicating where the bend is to be just above the edge of the lip of the vise. Then with one gentle but forceful push bend the aluminum. Try not to bend a bit, stop, bend a bit more, stop, etc. as this will fatigue the aluminum and might ultimately crack and break the bend. A word about the vise jaws - keep them as clean as possible as every particle will leave a mark in the aluminum that must later be removed if the piece is to be polished. The fewer the marks, the less work there will be later.
 ...
...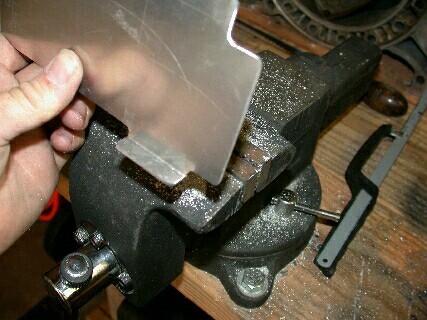
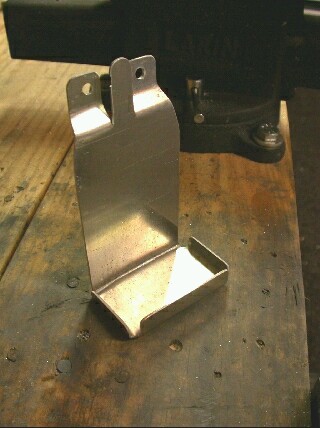
Step Eight: Test Fit. With the lower portion of the bracket complete, it was time for a test fit to see if everything fit before continuing on with the rest of the bends on the upper end of the bracket.
 ...
...
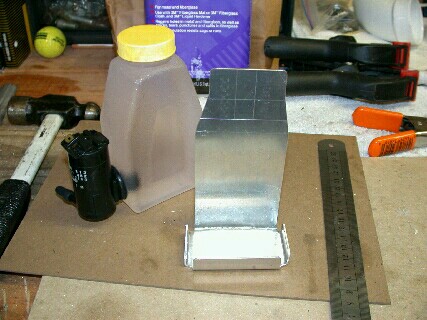
| Step Nine: Complete the upper bracket bends per the cardboard template design. Drill the mounting holes. Be sure to drill a small pilot hole first. Test fit the bracket into position to make sure the pilot holes line up with the holes where you want to mount the bracket - in this case the ignitor mounting holes. If the pilot holes are in the right location, drill out the holes to the full size. At this point the bracket can be used, however, I choose to always polish the aluminum parts. |
The complete bracket in the unfinished rough condition. |
|---|
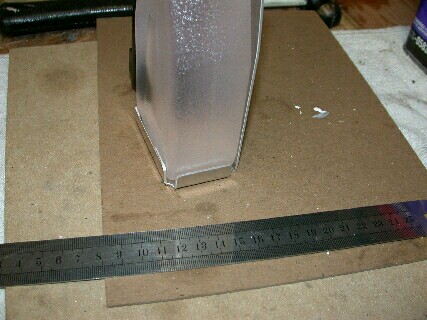
| Step Ten: Prepping for polishing. Wet sand the bracket first with 400 grit then with 600 grit sandpaper. Sand at 90 degrees between sanding with the 400 and 600 grit paper if possible. The sanding with the 600grit should be perpendicular to the direction of the buffer wheel during polishing. Be sure all irregularities are gone before moving between the different grades of sandpaper and then onto polishing. As they say it's all in the prep work. Without proper sanding all you will get is nicely polished scratches. Sometimes it takes a few iterations between sanding and polishing as the scratches sometimes don't show up until polishing with the buffer. Don't be afraid to go back and re-sand something that you just polished...it will polish again. |
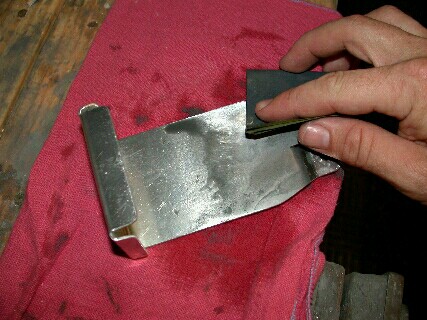
Wet sand. Use plenty of water, it helps the sand paper "cut" easier. |
|---|
| Step Eleven: Think you've sanded enough since your finger tips feel numb and you can't move your fingers to open your hand? Time perhaps for a test polish to see if the bracket is ready for the buffer. If the test polish takes minimal time to remove the fine scratches left over from the 600grit sandpaper then continue. If you spend 15 minutes trying to polish out scratches in one location then it's time to work more with the 600grit paper. Don't be afraid to use the buffing compound. I will never go more than 3 minutes between loading up the buffing wheel with buffing compound. It's the buffing compound that is doing the polishing not the wheel. |
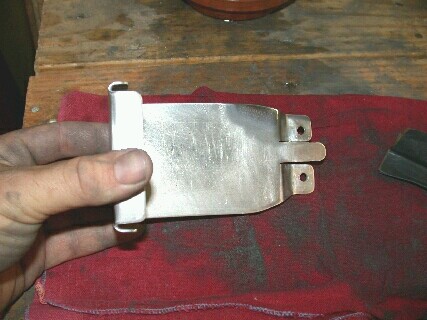
Test polish a corner to see if the whole item is ready for the buffer. |
|---|
| Step Twelve: Sit back and admire your work. A unique one of a kind custom fabricated part that you made with your own hands that no other has. The completed mini washer fluid reservoir installation can be found here. |
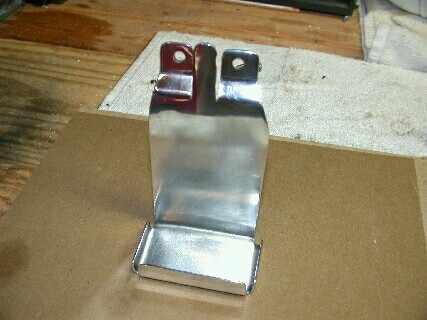
The finished polished custom fabricated bracket. |
|---|
| Post Log: Don't think making these brackets is easy. It takes time and effort and is fraught with failure. I typically need to make 2-3 prototypes before I finally get one that hasn't broken and that looks good and fits right. Having the right kind of aluminum on hand also helps. Be patient and as always it take lots of practice. And for the record this bracket, start to finish, probably took about 4 hours to fabricate. |
Failures: bent the wrong way - trash (left). Final bend, metal broke - trash (right) |
|---|