| If you are frequent track visitor you might be aware of the propensity for the RX-7 to consume oil above and beyond what is normally consumed by the oil injection system. Ever opened up your intake system and found puddles of oil in the intercooler, throttle body, and intake piping? Where does this oil come from? Well, two factors to consider are the prodigous amount of lateral grip the RX-7 can produce, especially when shod with R compound rubber, and the configuration of the PCV system and oil filler neck. The former is a good thing (lateral grip), the latter is not (PCV configuration). The PCV system isn't quite up the to task unfortunately. To be specific, the PCV system is there to vent crankcase pressure from "blowby" and other minor pressure fluctuations back into the intake plumbing. This is done by tapping into the oil filler neck and venting to both the underside of the upper intake manifold (plenum) and to the upstream side of the primary turbo. Why two taps? Because when under boost the PCV valve to the plenum is shut (you don't want the turbo to pressurize the crankcase!) and the "crankcase" (in our case the oil pan) must vent somewhere that there is a vacuum. The only place is upstream of a turbo. Thus, there are two lines, one valved to the plenum and one not. | 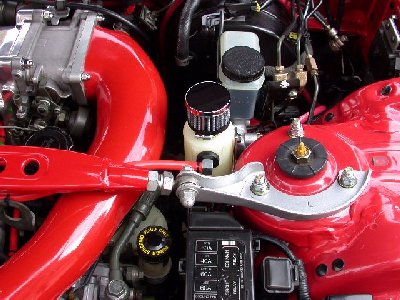 JAZ Pint Breather Catch Can |
|---|
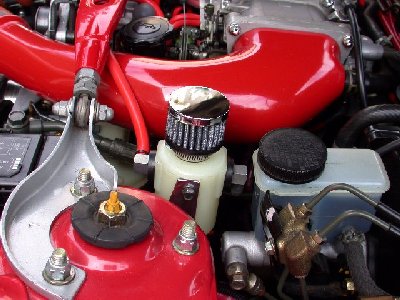 View from the passenger side of the car |
What happens is that under hard prolonged right hand cornering oil shifts to the left side of the oil pan. The pan is partially baffled so the problem only arises under long cornering situations. With all the oil shifted in the pan the propensity for oil to be drawn up the oil filler neck exists. It is then simply a case of vacuum from the two PCV taps on the filler neck that sucks the oil into the intake system. It is not uncommon for most track regulars to run a half quart low to minimize oil pickup but this is a less than optimal resolution to the problem. Oil will still make it's way into the intake system with the propensity to gum up solenoids and other sensors that are sensitive to mediums other than air for which they were not designed. So the solution is to route these PCV vacuum lines to a dedicated catch can and eliminate paths back to the intake system. In the early days I had seen the use of brake fluid bottles with the tops cut off. Effective but ugly and didn't look very reliable. As a tech inspector at a few track events I always frowned on this hodge podge hookup. The solution.......a JAZ pint size catch can. I saw one of these little catch cans at a recent track event and it appeared to me to fit the bill perfectly. This is a breathable can with two input nipples and a very trick valved drain port at the bottom. It is built from very rugged plastic and is opaque so fluid levels can be observed remotely without having to remove the top. |
|---|
| Price was about $50. Now the problem was where to mount it. I knew of the general vicinity that it "had" to go but finding something to bolt it to was tough. It had to be high enough so as to not syphon oil out of the oil filler neck, it had to be close enough so as to add only the minium amount of additional vacuum line, and it couldn't obstruct access to anything that I fiddle with on a regular basis, like the changing of sparkplugs. You can see where it ended up being placed from the pictures. The mounting position was facilitated courtesy of Mazda. Mazda had placed on the side of the shock tower two predrilled holes in the chassis (which for me were covered by two pieces of red tape) So I basically fabricated a bracket in the shape of an S from some alloy stock (polished of course) and which uses the two chassis holes and the two convenient prethreaded inserts in the catch can. Then some vacuum line was routed to the catch can from the top of the oil filler cap (see pic below). Both of the oil filler neck taps were capped. Originally I had used the upper filler neck tap to pipe overflow to the catch can, however this led to filling the catch can after a single 20 minutes session. I was advised to tap the oil cap with a fitting and pipe overflow from there, the highest point on the neck. Details below. As for the other ends of the OE PCV connections the nipple on the plenum was also capped. Similarly the line to the primary turbo was removed and the nipple on the intake pipe was also capped. All done...or so I thought. | 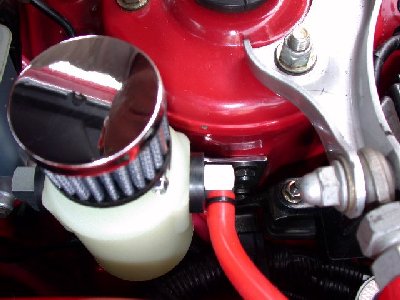 View of the alloy bracket and shock tower mounting point |
|---|
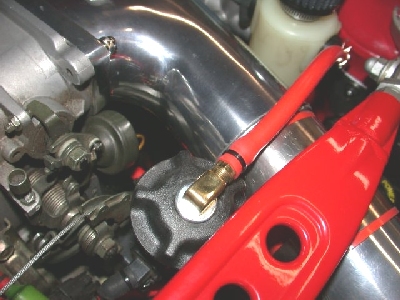 View of aftermarket oil filler cap fitted with brass 90 degree fitting and short length of hose. |
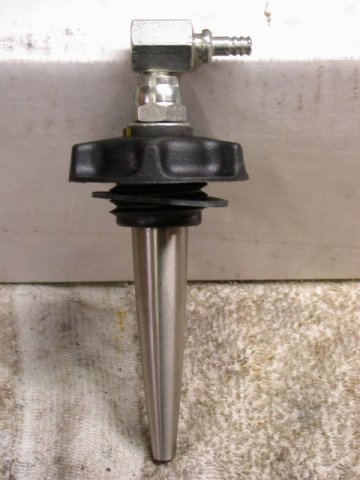
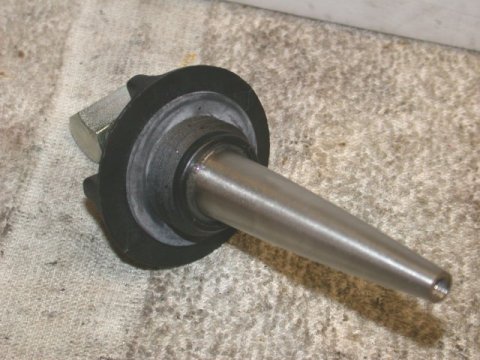
I used a Stant oil filler cap (PN 11082) drilled with a generic brass 90 degree fitting with a barbed nipple on one end inserted into the hole. To seal the fitting I used a flat washer and a rubber gasket. On the backside (inside the cap) is a lockwasher and nut to hold the brass fitting securely in the hole. The only drawback is in order to remove the oil cap I have to disconnect one end of the hose...no problem. I used a small spring clamp for easy removal of the hose end. |
|---|